Products
Solutions
Resources
9977 N 90th Street, Suite 250 Scottsdale, AZ 85258 | 1-800-637-7496
© 2024 InEight, Inc. All Rights Reserved | Privacy Statement | Terms of Service | Cookie Policy | Do not sell/share my information

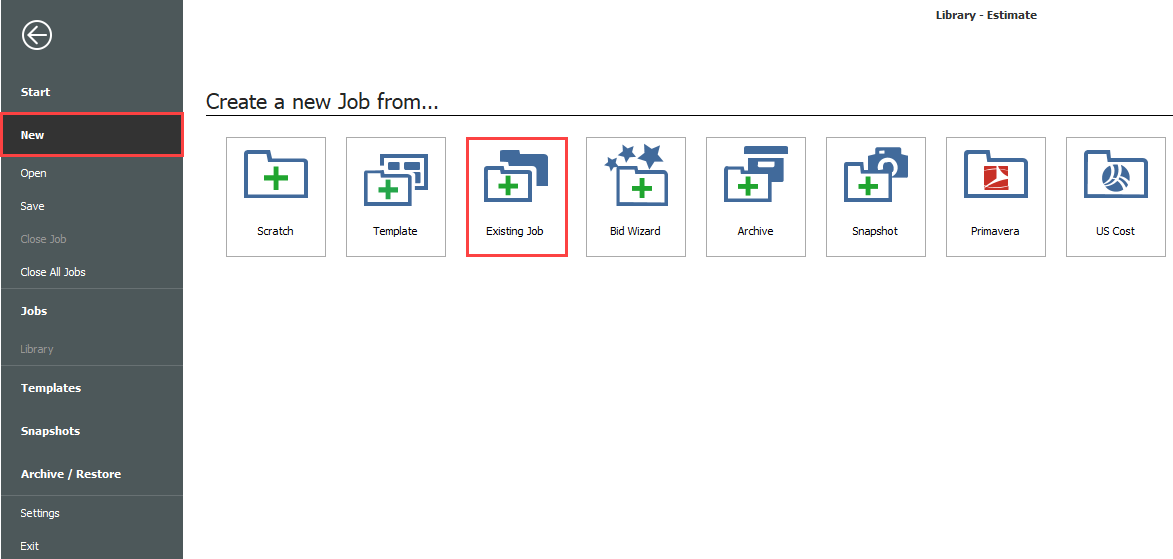
Click the File tab on the Estimate landing page.

From the left side panel, select New, then select Existing Job.
The Job Register displays a list of your existing projects; select the Training Job and click OK.
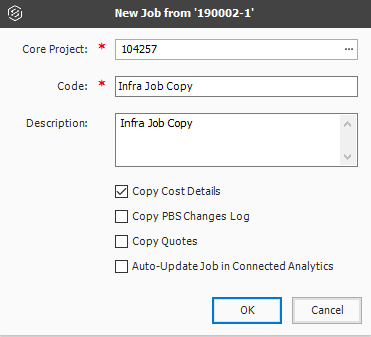
On the New Job dialog, click the ellipses and select a Core Project.
In the Code field, type Infra Job Copy with your initials.
To copy the cost details from the existing job to the new job, verify that the Copy Cost Details checkbox is selected
If you wanted to copy just the cost item structure without cost details, you would uncheck the box.
Uncheck the check for copying the PBS Changes Log, Copy Quotes and Auto-Update Job in Connected Analytics.
Click OK to create the new job.
The new job opens with the Job Properties form active, so you can begin to modify the new job as needed. If you look through the tabs on the Job Properties form, you will find that it looks exactly like the job from which it was copied. Other forms, such as the Pay Item & Proposal Register and the CBS Register, also look the same in both jobs until you make modifications in one job or the other.
This is a very easy method for creating a new job, and it is a good choice if you want to copy an entire job. However, if you want to pick and choose which parts of a job to duplicate, the Bid Wizard is a better choice.
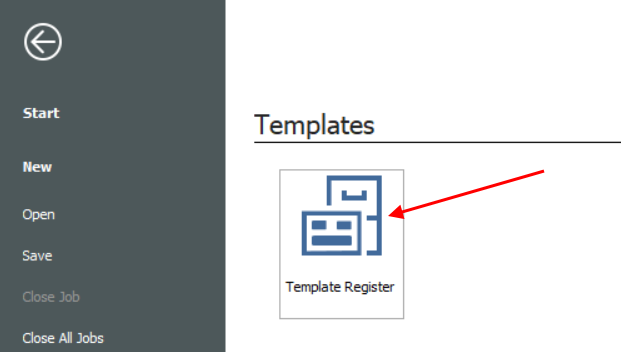
Click the File tab on the Estimate landing page.
From the left side panel, select Templates.
Under Templates, select the Template Register.
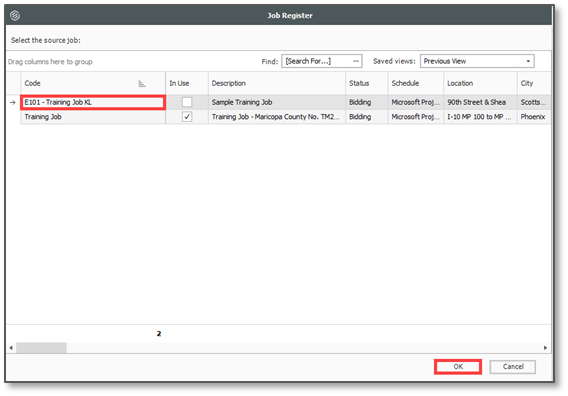
The Job Register opens for you to select the source job for the template
For example, you can make a template from your E101 Training Job
Select the E101 Training Job with your initials, and then click OK.
You cannot create templates from jobs that are published to Job Tracking.
The New Template From Job 'Training Job' with your initials prompt appears.
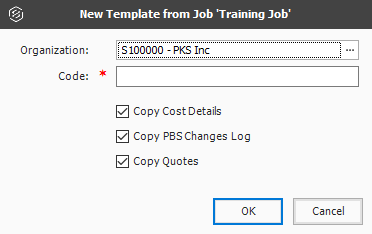
Click the ellipsis to the right of the Organization field.
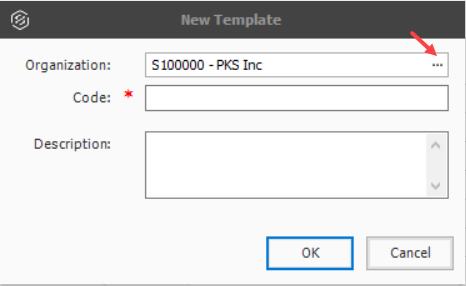
The Organization Register Library opens.
In the Organization Register Library, select an organization and then click OK.
In the Code field, type Small Project Template[your initials].
Leave Copy Cost Details and Copy PBS Changes Log checked
Click OK.
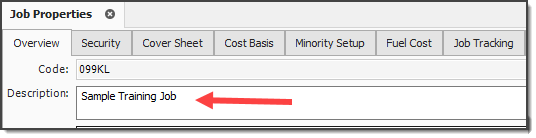
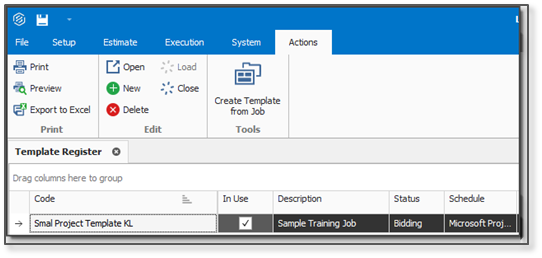
The new template is created and opens to the Job Properties form
You can add the description in addition to the code for any new job you are creating from a template. This description is later added to the Overview tab of the new job on the Job Properties form
Back in the Templates Register, you can see the new template created
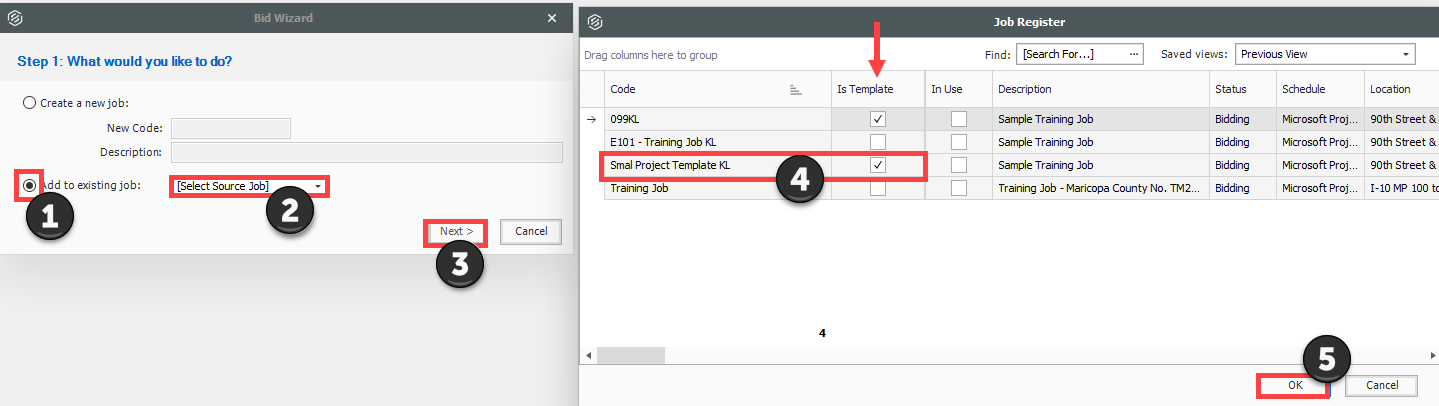
Select Add to existing job
From Select Source Job, click the dropdown arrow
Click Next
Select a job that is shown as having a Template
Click OK
Click File to open the Backstage View.
Select Archive / Restore.
Several options appear for archiving and restoring your jobs, templates, and library
Select Archive Template.
The Template Register appears
Select the Small Project Template [your initials] template you previously made, then click OK.
When prompted to include attachments, click Yes.
The Save As window appears
Browse to where you want to save the job, then click Save.
Select Restore Template from the Archive / Restore page of the Backstage View to begin restoring the template.
Browse to the archived template and select it.
Click Open.
If the template already exists, a prompt will appear asking if you want to overwrite it
To overwrite it, select Yes
If you select No, you will be prompted to save it under a new Template Code
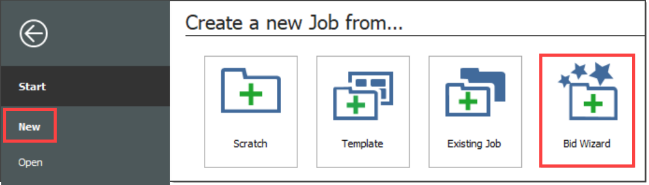
To open the Bid Wizard, click the File tab on the Estimate landing page.
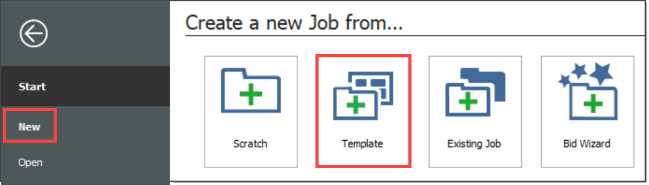
From the left side panel, select New, then select Bid Wizard.
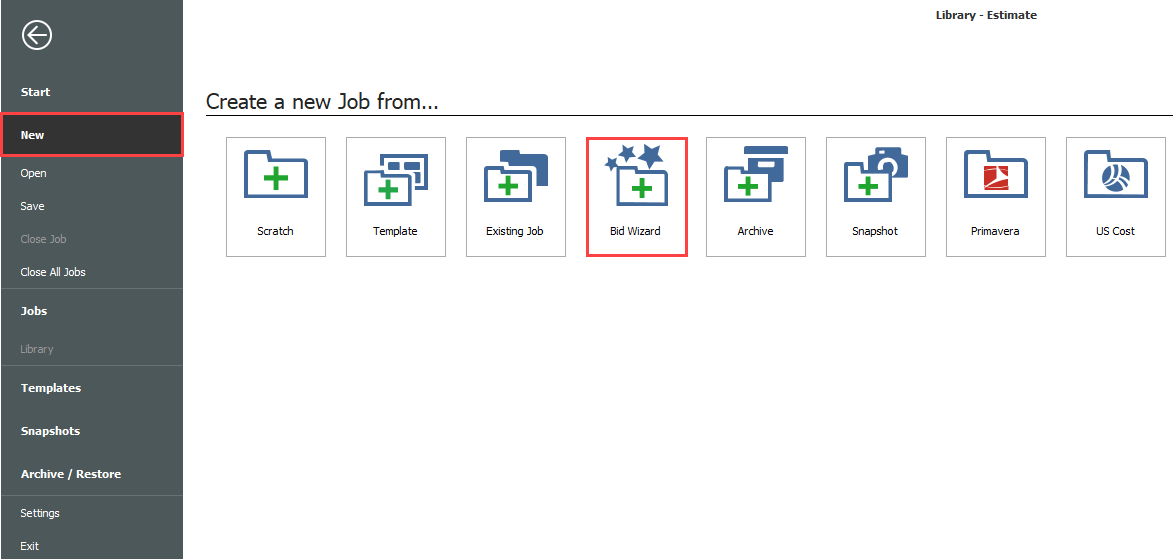
The Bid Wizard – Step 1 dialog displays
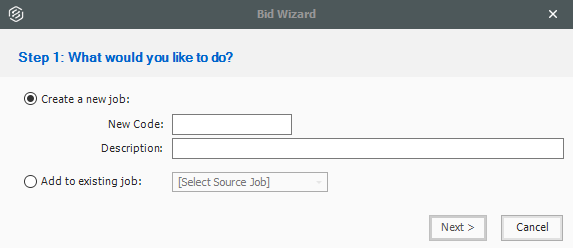
Notice that you can either create a new project or add to an existing project.
Type E101 Bid Wizard (with your initials) in the New Code field.
Type Bid Wizard Example in the Description field.
Click the Next button.
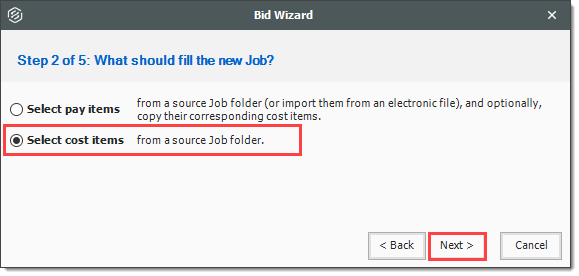
The Bid Wizard – Step 2 dialog displays
Choose Select cost items and click Next.
The Bid Wizard – Step 3 of 4 dialog displays
You use this step to indicate which source you want to pull your setup data from (the library or your source job)
For all selections, select Copy from source job.
Check the Also copy all non-utilized resources checkbox.
Select Copy from source job under Unassigned Cost Items and Markup, and the Copy Markup box is automatically selected.
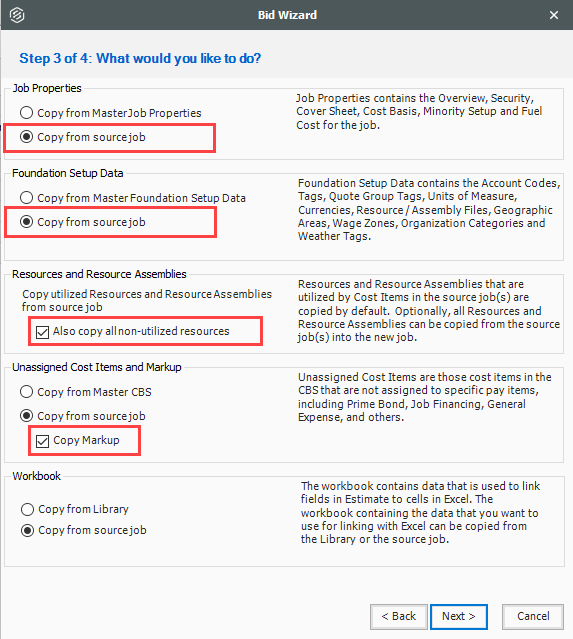
Click Next.
The Bid Wizard – Step 4 of 4 dialog displays
Click the Source Job drop-down arrow.
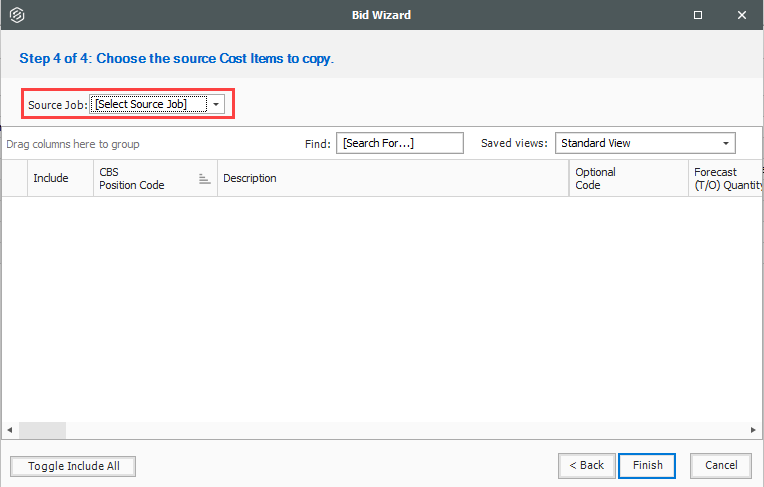
The Job Register opens
Find and select Training Job.
Click OK.
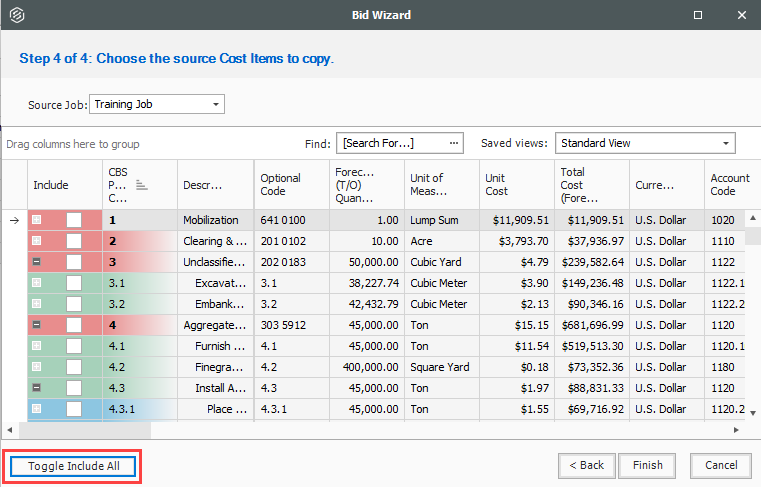
This screen displays the cost items of the source job (Training Job). All items are automatically selected
Use the Toggle Include All button to exclude all selections.
Select the checkboxes to include Mobilization, Clearing & Grubbing, and Unclassified Excavation.
Notice that when selecting Unclassified Excavation, that cost item’s subordinates are automatically selected
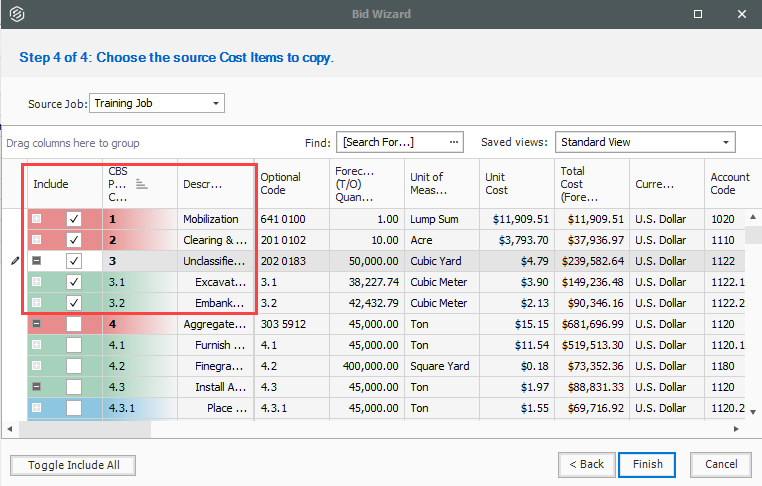
Click Finish to add the new job.
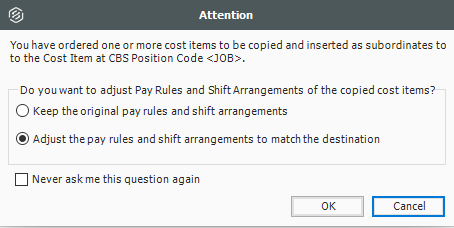
An Attention prompt appears asking, “Do you want to adjust Pay Rules and Shift Arrangements of the copied cost items?”
Typically, you will want to use the shifts and payment rules of your new destination job.
Select Adjust the pay rules and shift arrangements to match the destination.

Click OK.
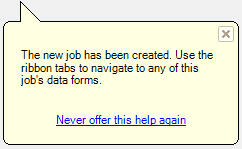
A help bubble appears letting you know the job has been created, and that you can use the ribbon tabs on the Estimate landing page to open any form
Close the help bubble by selecting the X in the upper right corner.
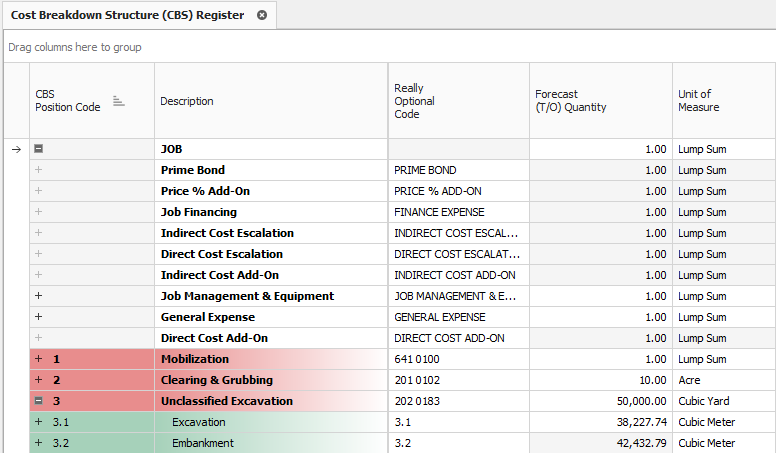
Open the Estimate > CBS to see the three cost items that were brought in.
Click the File tab from the Estimate landing page and open the E101 Bid Wizard job you just created.
Open the Training Job (if you do not still have it open).
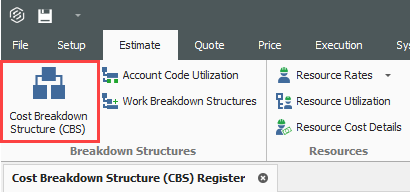
Make sure the CBS is open for both jobs by going to the Estimate menu and selecting Cost Breakdown Structure (CBS).
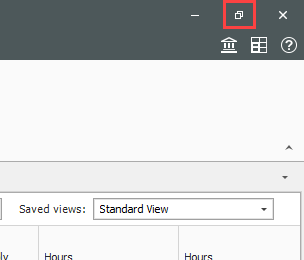
Since you have both jobs open and they are in their own application window, align them to be side by side by using the minimize icons of each job or utilizing Windows align functionality.
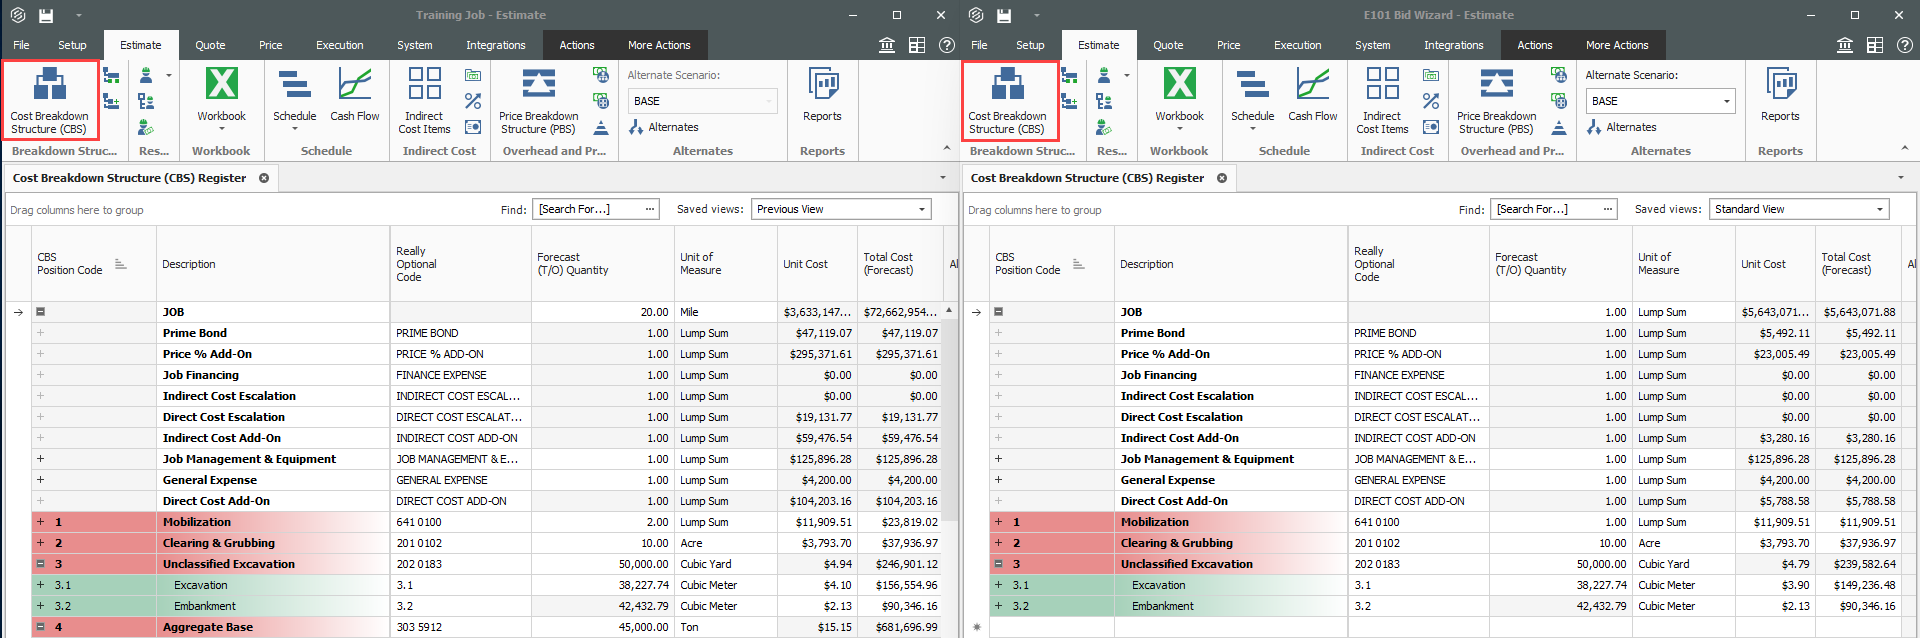
On the CBS of the Training Job, click the row header on cost item 4 – Aggregate Base and press Ctrl+C to copy the cost item.
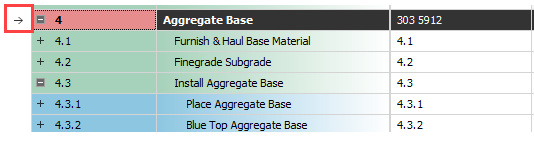
When you copy a superior cost item, all of its subordinates are automatically copied.
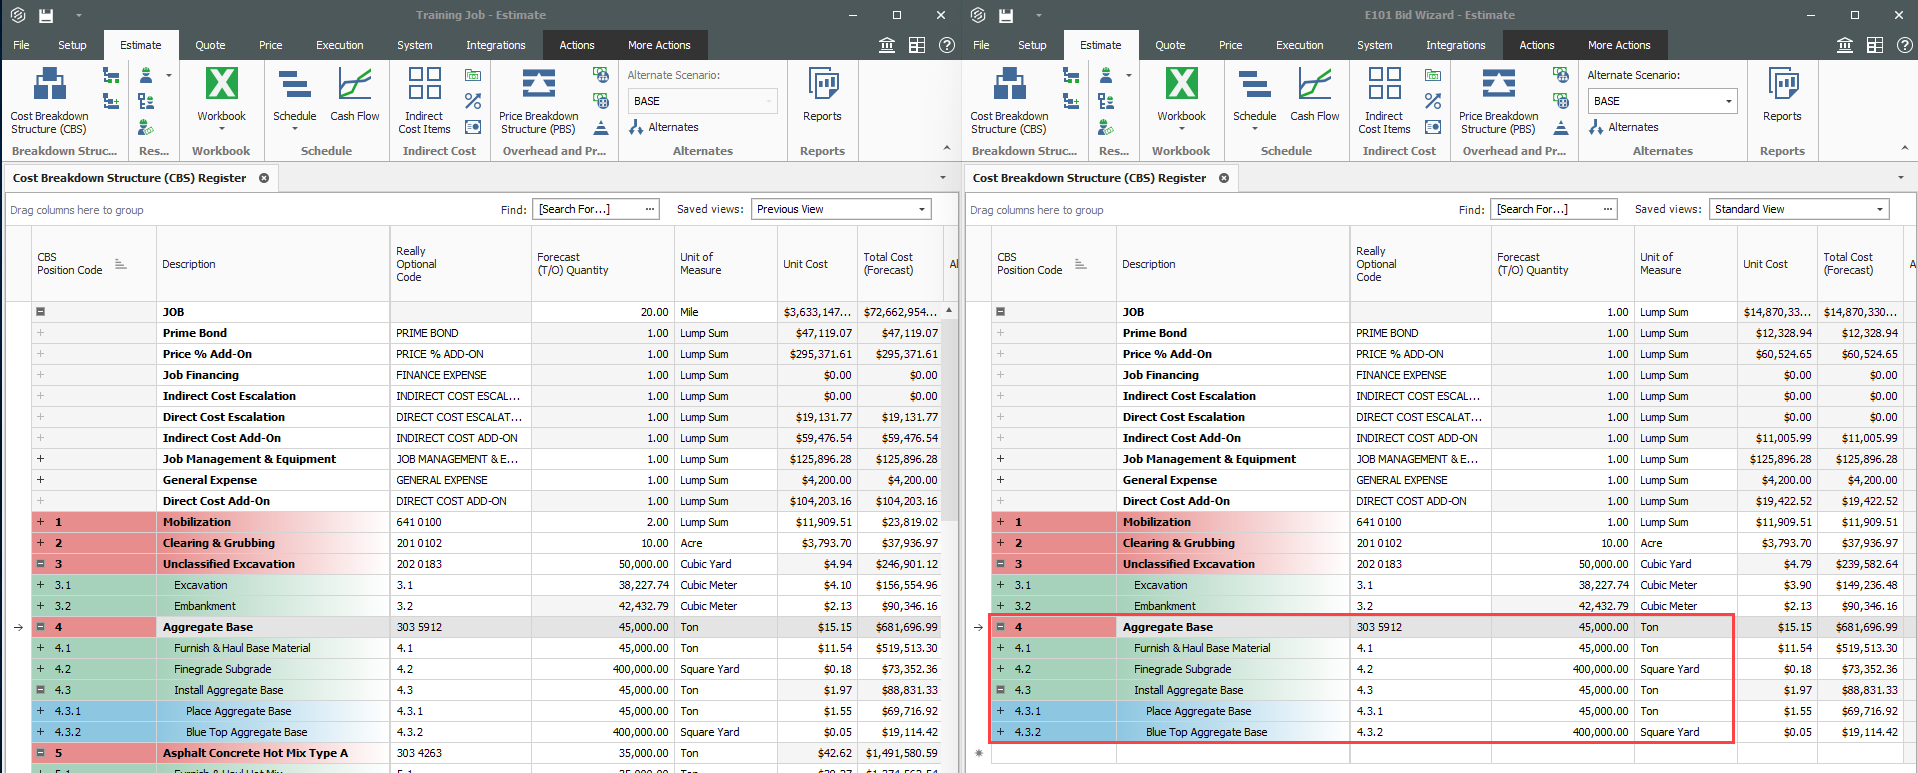
On the CBS of the E101 Bid Wizard job, click the row header on the first blank register row, and press Ctrl+V to paste the cost item.

On the Attention dialog, select Adjust the pay rules and shift arrangements to match the destination and click OK.
You can see in the destination job’s CBS that you’ve added the Aggregate Base cost item, along with its subordinate cost items and all cost and productivity detail
You can also drag and drop cost items from one CBS to another instead of copying and pasting.
Copied cost items are considered Job Overhead until they are assigned to a pay item
To go back to your full screen view of the E101 Bid Wizard job, select the maximize icon.
Click the File tab from the Estimate landing page and open the E101 Bid Wizard job you created.
From the Estimate tab, select Cost Breakdown Structure (CBS).
Create a new cost item by typing New in the Description column on the bottom row of the CBS
Highlight the New row.

To open the CBS Bid Wizard, click the Bid Wizard icon on the More Actions tab.

The Bid Wizard window opens
Click in the Source Job column on the New cost item row.

From the Source Job drop-down list, select Training Job.
Scroll to the right of the Source Job column and click in the Source CBS Position Code column on the New Cost item row.
A source CBS Register window appears
Select CBS position code 5 – Asphalt Concrete Hot Mix Type A from the register.
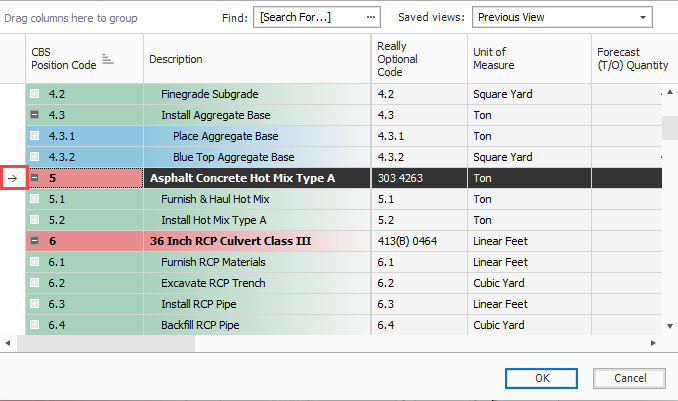
Click OK.
Click Finish on the Bid Wizard.
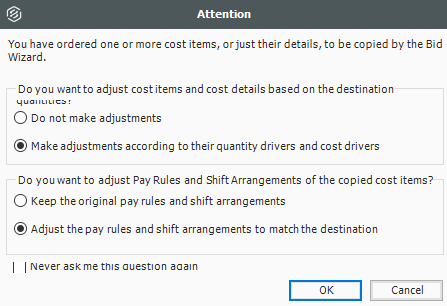
An Attention prompt displays, asking if you want to make adjustments
Keep the default options selected: Make Adjustments according to their quantity drivers and cost drivers and Adjust the pay rules and shift arrangements to match the destination
Click OK.
You can see that cost item 5 and its subordinates are now imported into your existing job.
You could choose a new name for the cost item, or name it Asphalt Concrete Hot Mix Type A to match the original cost item

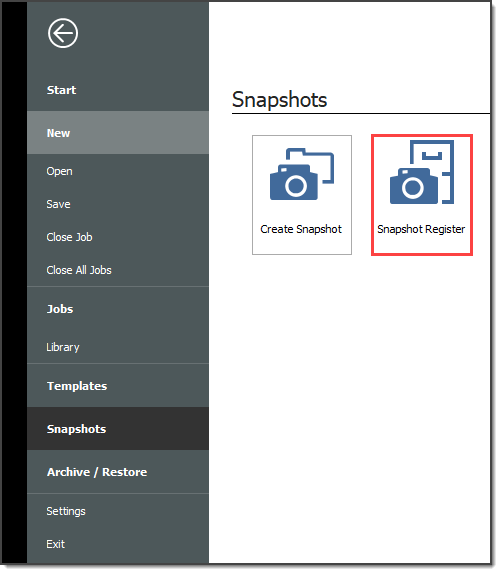
Click theFile tab to open the backstage view, and then select Snapshots.
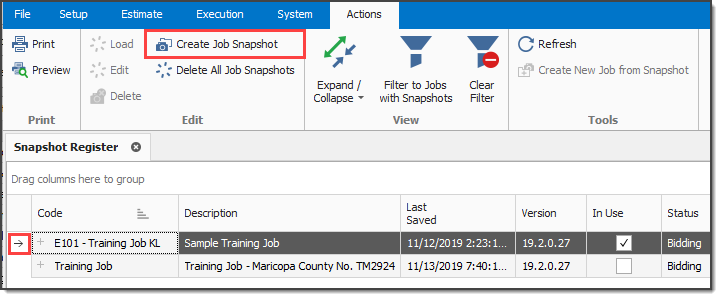
From the Snapshots form, select the Snapshot Register icon. The Snapshot Register opens.
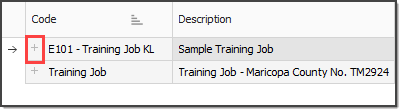
To view individual snapshots for specific jobs, click the Expand icon next to the job to show the list of snapshots.
From the Snapshots form, select the Create Snapshot button.
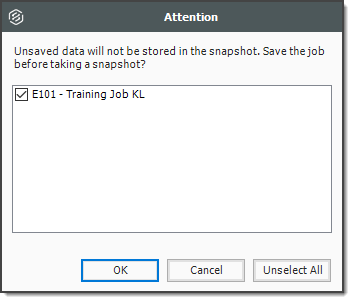
The job must be saved before creating a snapshot. If the job you are creating a snapshot from has unsaved data, an Attention dialog box shows that alerts you of the unsaved data. Click OK to save the job.
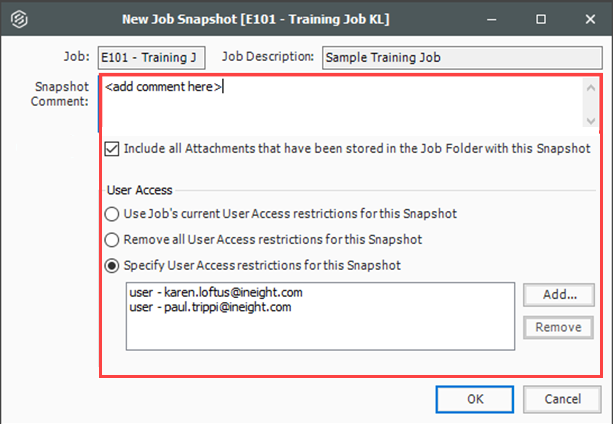
The New Job Snapshot [job code] dialog box opens. You can do the following:
Add a comment in the Snapshot Comment field.
Select the check box to include existing attachments.
Configure user access. Select one of the following options:
Select Use Job's current User Access restrictions… to use the job’s current access restrictions.
Select Remove User Access restrictions… to allow read-only access to all users.
Select Specify User Access restrictions… to specify new user restrictions. This option is selected by default. You can then use the Add and Remove buttons to specify access using Active Directory. Users with current access to the job are automatically added to the list.
Click OK to create the snapshot. A Success message shows to indicate that the snapshot has been created.
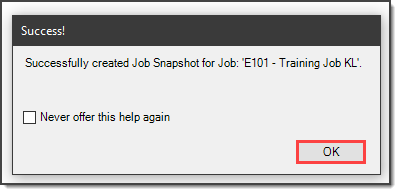
Click OK.
In the Snapshot Register, click the Expand icon next to the job to show the snapshots.
Right-click the individual snapshot you want to edit, and then select Edit.
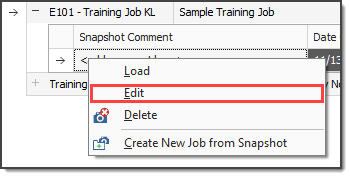
The Edit Job Snapshot dialog box opens. You can do the following:
Add a comment in the Snapshot Comment field.
Select the check box to include existing attachments.
Configure user access. Select one of the following options:
Select Use Job's current User Access restrictions… to use the job’s current access restrictions.
Select Remove User Access restrictions… to allow read-only access to all users.
Select Specify User Access restrictions… to specify new user restrictions. This option is selected by default. You can then use the Add and Remove buttons to specify access using Active Directory. Users with current access to the job are automatically added to the list.
Click OK to update the snapshot.
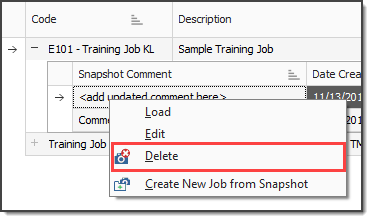
From the Snapshot Register, click the Expand icon next to the job to show the snapshots.
In the Delete Job Snapshot dialog box, click OK.
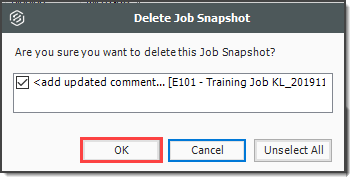
You can also click Delete All Job Snapshots in the Actions tab to remove all snapshots.

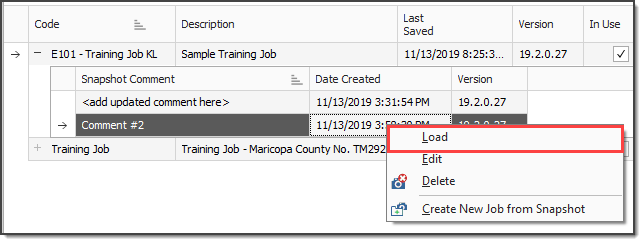
From the Snapshot Register, click the Expand icon next to the job to show the list of snapshots.
Right-click the individual snapshot you want to load, and then select Load.
On the Snapshot Register, click the Expand icon next to the desired job to display the list of snapshots.
Right-click on the individual snapshot you want to load and select Load.
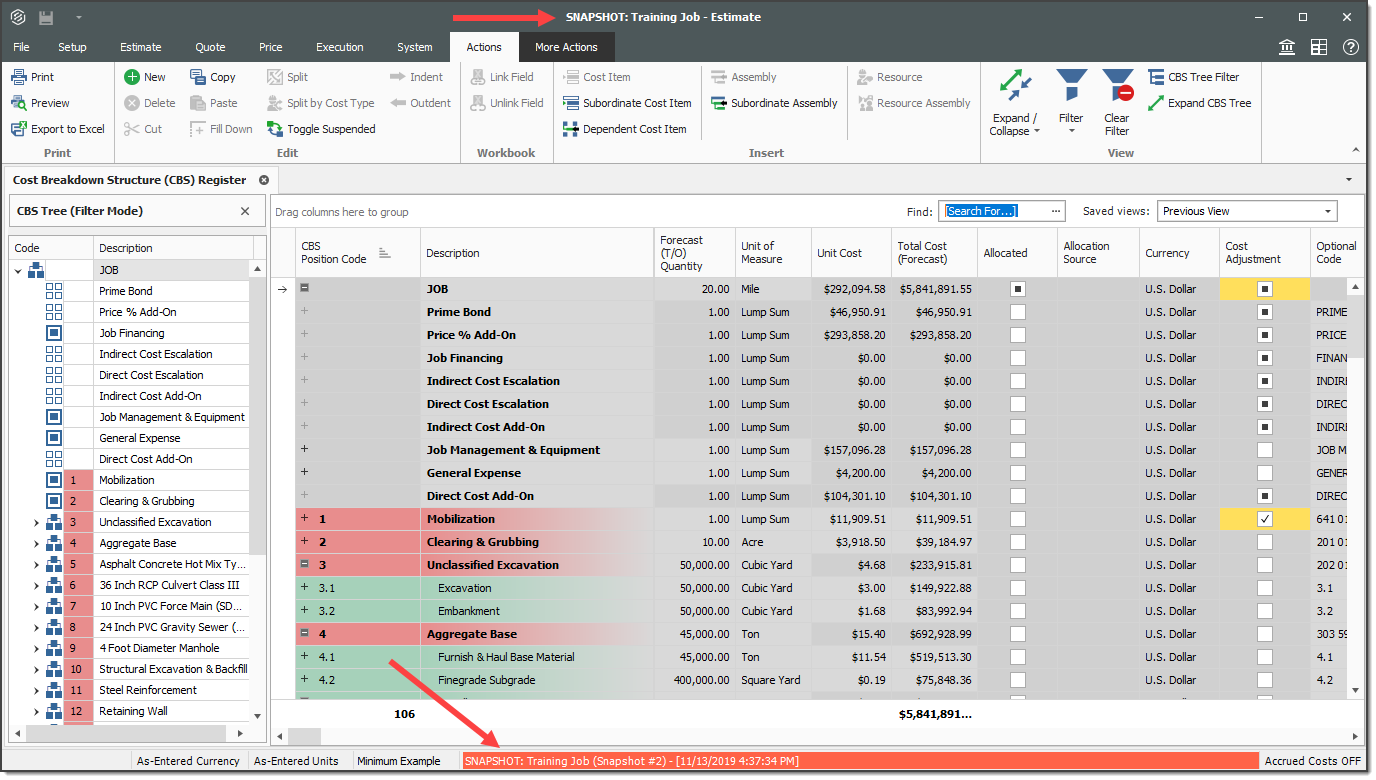
To identify a snapshot in Estimate as a read-only snapshot:
The job name is preceded by the label SNAPSHOT centered on the top of the toolbar.
A red banner shows the snapshot information at the bottom of the page.
A snapshot can be modified, but it cannot be saved because it is read-only.
Additional Information
9977 N 90th Street, Suite 250 Scottsdale, AZ 85258 | 1-800-637-7496
© 2024 InEight, Inc. All Rights Reserved | Privacy Statement | Terms of Service | Cookie Policy | Do not sell/share my information